How to Launch Your First Solo Ad Campaign — Step by Step
A practical guide to setting up, testing, and scaling a solo ad campaign in 2026 — with real budget numbers, vendor vetting tips, and the benchmarks you actually need.
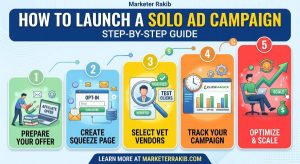
Solo ads are a paid email traffic method where you rent another person’s list to promote your affiliate offer. To launch a campaign, you need a lead-capture landing page, a tracking link (ClickMagick), a vetted vendor, and a test budget of $100–200 for 200–300 clicks. A good opt-in rate is 30% or higher. If it’s below 25%, fix the page before buying more traffic. Once you validate a funnel, you scale by increasing click volume with the same vendor or testing a second one.
I’ve bought solo ad traffic across dozens of campaigns, and the single biggest mistake I see beginners make is skipping the setup. They find a vendor, send $200, and wait. When nothing converts, they declare solo ads a scam.
Solo ads aren’t a scam. But they’re not a magic traffic button either. The ones who win treat the first campaign as a data-gathering exercise, not a sales machine. When you have the right funnel, the right tracking, and the right vendor, solo ads can fill your email list with hundreds of qualified leads in 48 hours — faster than any other paid channel I know of.
This guide walks you through every step, in order, with the specific numbers and decisions you’ll actually face.
Define your goal and choose your niche
Before you touch a vendor or a budgetBefore anything else, get very clear on two things: what you’re promoting and what you want to happen when someone clicks your link. These sound obvious, but most beginners skip this and pay for it later.
Solo ads are designed for list building in specific niches. They are not a fit for every offer. The niches where they consistently perform: make money online (MMO), business opportunity (BizOp), affiliate marketing, crypto and forex, personal development, and health and wellness.
Your primary goal for a first campaign should be email opt-ins, not sales. Sales from cold traffic are possible but unpredictable. Building a list gives you repeated access to the same people — meaning the value compounds over time.
Write this down before moving on: “I am promoting [offer] to people interested in [niche], and I want them to [opt-in / buy] by landing on [URL].”
Build your landing page and lead magnet
The page your traffic will land on — make it countThe landing page is the single most important variable in your campaign. A great vendor sending traffic to a weak page will underperform a mediocre vendor sending traffic to a strong one. This is where most of your optimization effort should live.
What a high-converting solo ad landing page needs
- One clear headline above the fold — Make it benefit-focused. “Discover the 3-step system I used to generate 200 leads in 48 hours” beats “Sign up for my newsletter.”
- A specific lead magnet — Give something in exchange for the email: a free checklist, short PDF guide, or mini-course. Vague freebies (“get updates”) convert poorly.
- A single opt-in form — Name and email only, or just email. Every extra field reduces conversions.
- No navigation menu — Remove all links that lead away from the page. The only choice should be opt-in or close.
- Fast load time — Under 3 seconds. Email traffic on mobile is common. A slow page kills your rate before it starts.
- Social proof if you have it — A testimonial, a result screenshot, or even a number (“join 4,800+ readers”) helps.
Build the page, then ask 10 people from your network to review it before buying traffic. If they’re confused about what you’re offering within 5 seconds, rewrite the headline.
Set up tracking with ClickMagick
You cannot optimize what you can’t measureTracking is non-negotiable. Without it, you’re flying blind — you won’t know if your vendor delivered real clicks, how many were unique vs. raw, where your opt-ins came from, or which part of your funnel is leaking.
ClickMagick is the industry standard for solo ad tracking. Here’s how to set it up:
Inside ClickMagick, create a new tracking link pointing to your landing page URL. This is the link you’ll give to your vendor instead of your direct URL.
Turn on ClickMagick’s bot and proxy filtering. This removes clicks from data centers, known bots, and suspicious IPs before they inflate your numbers.
After someone opts in they land on a thank-you page. Place the ClickMagick pixel here to track opt-in conversions tied to each click source.
A healthy campaign delivers 80%+ unique clicks. Below 70% may indicate list recycling or shared openers — ask your vendor why.
You want 70%+ from Tier 1 countries: USA, UK, Canada, Australia, New Zealand. Less than that signals low-value traffic.
Choose and vet your vendor
The decision that determines everythingThis is where campaigns succeed or fail. The right vendor gets you qualified, responsive leads. The wrong one delivers recycled addresses and bot-inflated click counts that look good in a spreadsheet and vanish when you email them.
I’ve seen the exact same funnel go from a 12% opt-in rate with one vendor to 38% with a different one. The list quality is that significant.
— Personal experience across 30+ campaignsVendor vetting checklist
- Check recent reviews on Udimi or Facebook groups — Look for reviews from the last 3 months from verified buyers. Consistency matters more than volume of ratings.
- Ask for campaign screenshots from other buyers — Real vendors have real proof. Be skeptical of anyone who can’t show recent opt-in stats from similar offers.
- Verify niche alignment — Ask directly: “Is your list primarily interested in [your niche]?” A health-focused list won’t convert well for a crypto offer.
- Ask about list cleaning practices — Lists should be cleaned monthly. Ask when they last removed inactive subscribers. Stale lists have low engagement regardless of size.
- Confirm Tier 1 percentage — Get a written or verbal commitment to 70%+ Tier 1 traffic.
- Start with a 100-click test — Never start with 500+ clicks from an unproven vendor. A 100-click test costs $50–80 and tells you everything you need to know.
Recommended vendors for 2026
Place your first test order
200–300 clicks is enough to judge qualityYour first order should be 200–300 clicks — roughly $100–180 depending on the vendor. This gives you enough data without committing to a larger spend before you know it converts.
Provide your ClickMagick tracking link (not your direct URL) and confirm niche targeting and Tier 1 percentage in writing. Most reputable vendors accept PayPal, credit card, or Bitcoin.
What to do while you wait for delivery
Set up your email follow-up sequence in your autoresponder (GetResponse, AWeber, or ActiveCampaign). Have at least 3–5 emails ready. Email 1 delivers the lead magnet. Email 2 introduces you. Emails 3+ pitch your affiliate offer. Without a follow-up sequence, you’re wasting 80% of the potential value from every lead you capture.
Quality vendors deliver within 24–72 hours. If it’s been 5 days and nothing has moved, follow up. If they can’t explain the delay, request a refund.
Analyze your results and optimize
Data, not gut feelingOnce delivery completes, open your ClickMagick dashboard and answer these four questions before making any decisions:
If the vendor checks out on all four metrics but your opt-in rate is below 25%, the problem is your page — rewrite the headline and lead magnet, then test again. If the vendor fails on Tier 1 or unique click ratio, a good vendor will acknowledge it and make it right. A bad one will deflect — and that tells you everything.
Scale what works
More of what converts, nothing elseScaling solo ads is straightforward once you’ve validated a funnel. More traffic to a proven page generates predictable results. The risk of scaling is low when you know your numbers.
Benchmarks: what good looks like in 2026
Real-world numbers across campaigns in the MMO, BizOp, and affiliate marketing niches. Use them to assess your performance honestly.
| Metric | Poor | Decent | Good | Excellent |
|---|---|---|---|---|
| Opt-in rate | < 25% | 25–30% | 30–40% | 40–55% |
| Tier 1 % | < 60% | 60–70% | 70–85% | 85–100% |
| Unique click ratio | < 70% | 70–80% | 80–90% | > 90% |
| Cost per lead (MMO) | > $4 | $2–4 | $1–2 | < $1 |
| Email open rate (Day 1) | < 10% | 10–15% | 15–25% | > 25% |
| Delivery speed | > 5 days | 3–5 days | 1–3 days | Under 24h |
Frequently asked questions
The questions I get most from people launching their first campaign.
Ready to launch your first campaign?
Get 100% Tier 1 real traffic, free funnel audit, +10% extra clicks, and verified ClickMagick stats. Campaigns delivered within 24 hours.
Get Solo Ads Traffic Calculate your ROI first →