Does your organization need a simple way to keep everyone connected? Imagine a space where you can share updates, work together, and talk to your audience—just like chatting with friends. That’s exactly what a Facebook Group can do for you.
With a group, you can build stronger relationships, share event details, and keep everyone updated. No more messy emails or missed messages. It’s like having your own little online community.
The best part? It’s super easy to set up. You don’t need to be a tech expert. You just need a clear idea of what you want.
I’ll guide you step by step on how to create a Facebook Group for an organization.
Key Takeaways:
- A Facebook Group helps your organization connect with people, share updates, and build a strong community.
- It’s easy to set up, even if you’re not good with tech.
- Decide the group’s purpose, choose a good name, and pick the right privacy setting.
- Add a cover photo, write clear rules, and invite members to join.
- Post regularly and keep the group active to grow your community.
- Use your group to promote events, answer questions, and keep everyone engaged.
What is a Facebook Group?
A Facebook Group is like a digital gathering space. It allows people with common interests to connect, share, and collaborate.
For organizations, it’s perfect for:
- Announcements
- Event promotions
- Community building
- Collaboration
Why Should Your Organization Create a Facebook Group?
Here’s why a Facebook Group is worth it:
Types of Facebook Groups
- Public: Everyone can find and join.
Example: An organization promoting public events.
- Private (Visible): Only members see the content, but the group is searchable.
Example: A team discussion group.
- Private (Hidden): Only invited members know the group exists.
Example: Internal staff groups.
Feature | Facebook Page | Facebook Group |
|---|---|---|
Purpose | Public promotions | Community building |
Audience Interaction | Limited | High |
Privacy Options | Public only | Public, Private, Hidden |
Preparation Before Creating a Group
- Decide on the Group’s Purpose
- Why are you creating the group?
- Examples:
Build a fan community.
Share updates with customers.
Create a space for staff communication.
- Choose a Name
- Make it short, clear, and easy to remember.
- Examples:
“Tech Talks Hub”
“Green Earth Community”
- Select Privacy Settings
Here’s how to decide:
- Public: Great for promotional or awareness groups.
- Private: Best for internal teams or exclusive communities.
- Prepare Branding
- Cover Photo: 1640x856 pixels works best.
- Logo or Profile Picture: Use your organization’s branding.
Step-by-Step Process on How to Create a Facebook Group for an Organization
Follow the steps below to create a perfect FB group for your organization.
Creating a Facebook Group for your organization is simple. I’ll walk you through every step. Just follow along, and you’ll have your group ready in no time.
Step 1: Open Facebook
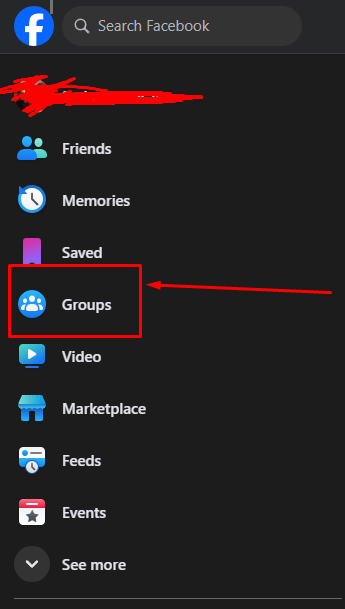
- On the left-hand side of your homepage, look for the Groups tab. Click on it.
- On the mobile app? Tap the menu icon (three horizontal lines) and select Groups.
Step 2: Click ‘Create New Group’
In the Groups section, find the Create New Group button.
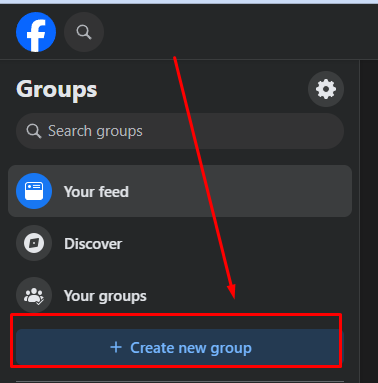
Click it, and a new page will open.
Step 3: Choose a Name for Your Group
- Now, give your group a name.
- The name of your group should be clear, concise, and relevant to your organization and its purpose.
- Use keywords that your target audience is likely to search for.
- For example, if your organization is a digital marketing agency, you could name your group 'Digital Marketing Tips & Tricks' or 'Digital Marketing Mastermind'.
Step 4: Select Privacy Settings
Decide who can see your group.
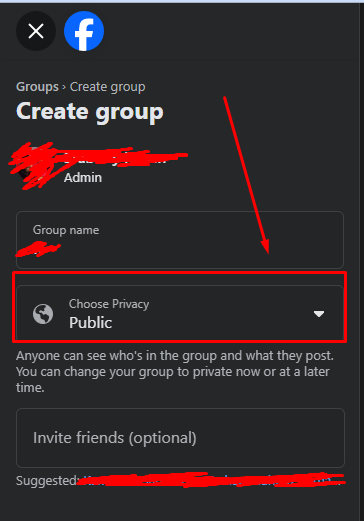
- Public: Anyone can find and join.
- Private: Only invited people can see the group.
**For organizations, private groups work best.
Step 5: Add People to the Group
- You’ll see a box to invite people.
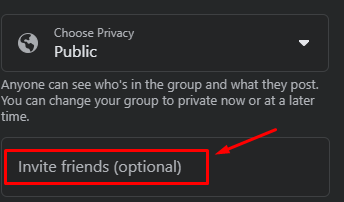
- Type their names or email addresses.
- Start with your team or members of your organization.
Step 6: Customize Your Group
Now it’s time to make your group look great!
- Upload a Cover Photo: Use your logo or a nice image (1640x856 pixels work best).
- Write a Description: Explain what your group is about.
- Example: “This group is for sharing updates, events, and tips related to our organization.”
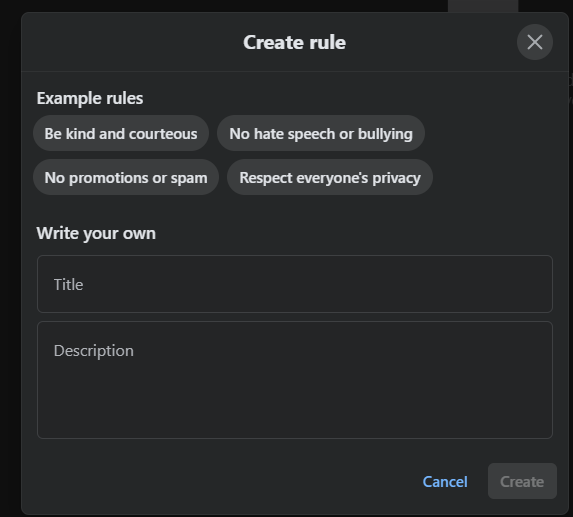
Set Rules: Add rules like “No promotions or spam” or “Respect everyone’s privacy.”
Step 7: Post a Welcome Message
- Write your first post to welcome everyone.
- Introduce your group and explain its purpose.
- For example:
“Welcome to the group! This space is for sharing updates, asking questions, and connecting with each other. Let’s build a great community together!”
Step 8: Engage and Grow Your Group
- Post updates regularly.
- Share tips, announcements, and events.
- Reply to comments and encourage discussions.
- Ask members to invite others who might be interested.
Managing Your Group
Use Facebook’s Admin Tools to:
- Approve new members.
- Moderate posts.
- Keep track of group activity.
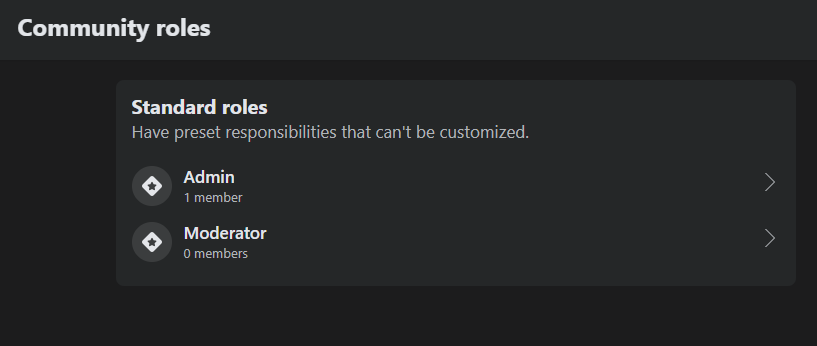
- You can also assign roles like admins or moderators to help manage the group.
Facebook Group Insights
The Facebook Group Insights section helps your group grow and stay active. It gives you important stats about what’s happening. Here’s how it helps:
Boost Growth
Insights show how many people posted & commented in your group and how many people viewed your group during the dates you selected.
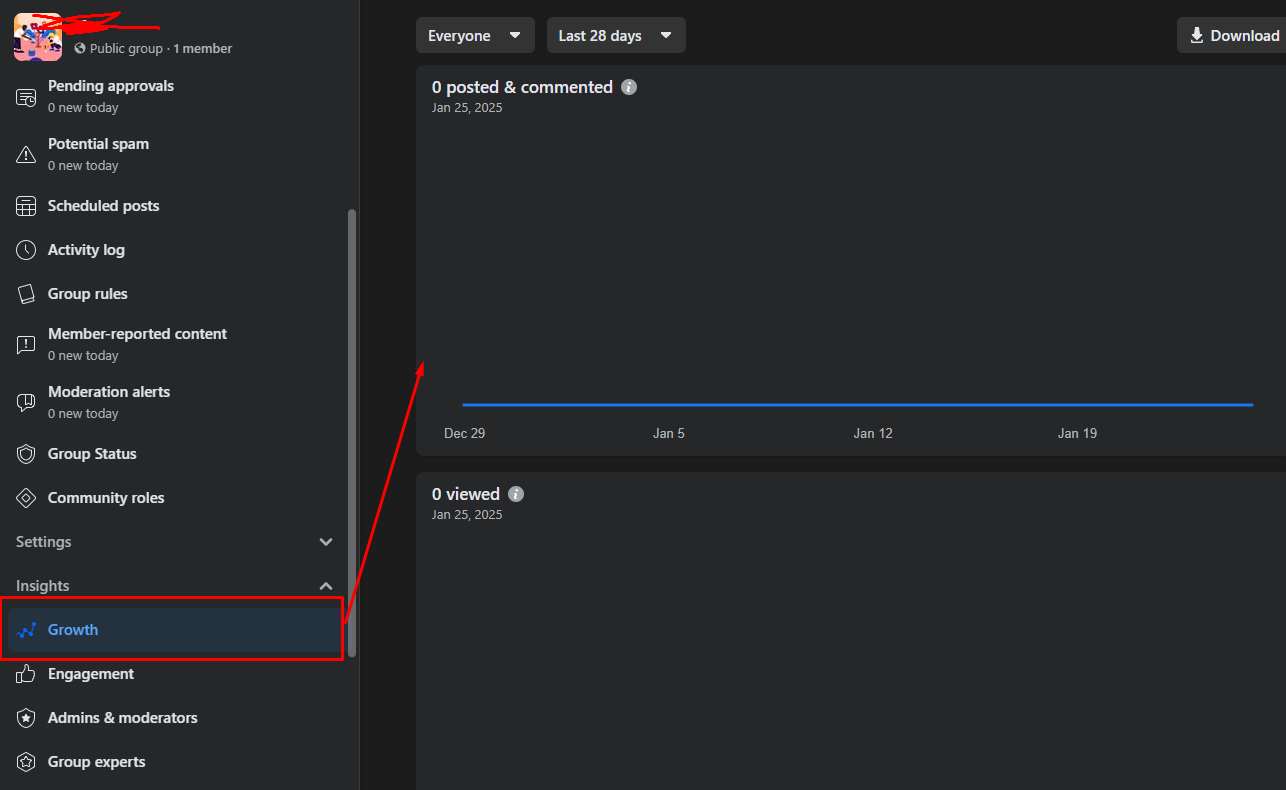
You can spot trends, like when more people join, and use this to promote your group better.
Increase Engagement
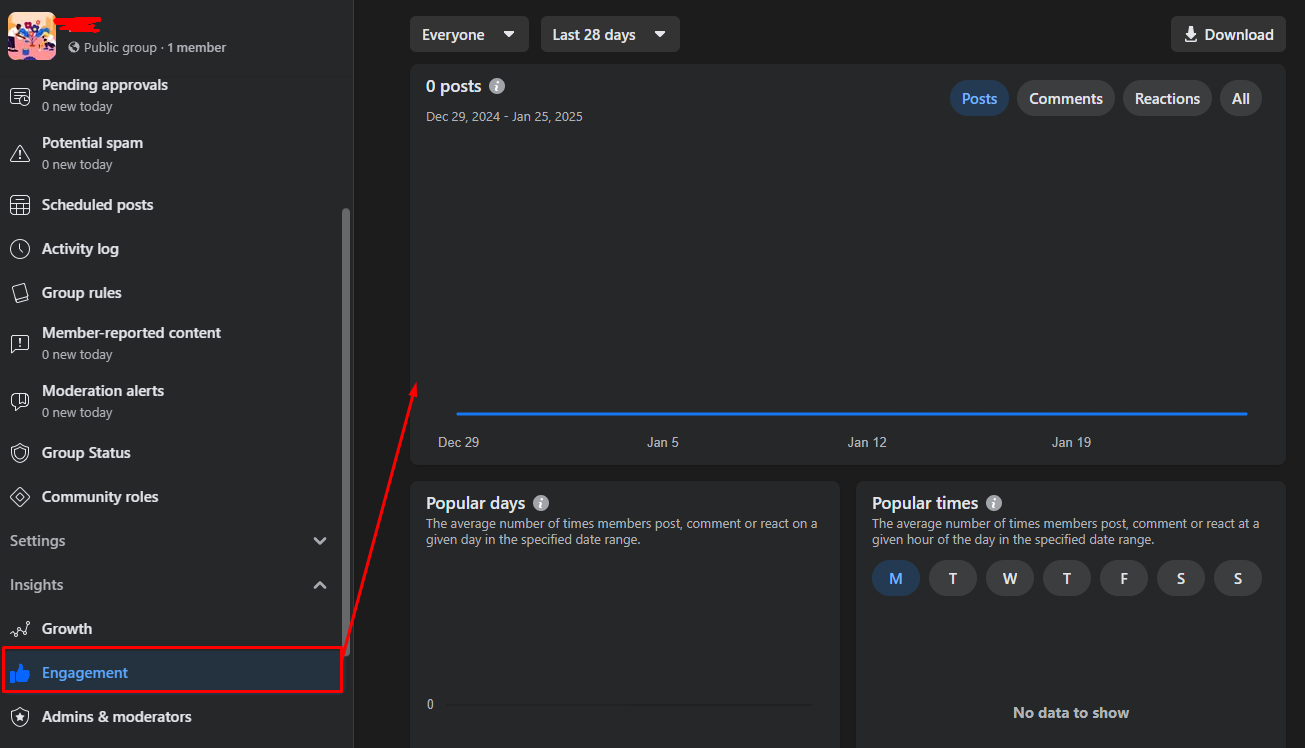
It tracks which posts get the most reactions, comments, and shares. This helps you understand what your members like along with the popular times so you can post more of that content.
Support Admins and Moderators
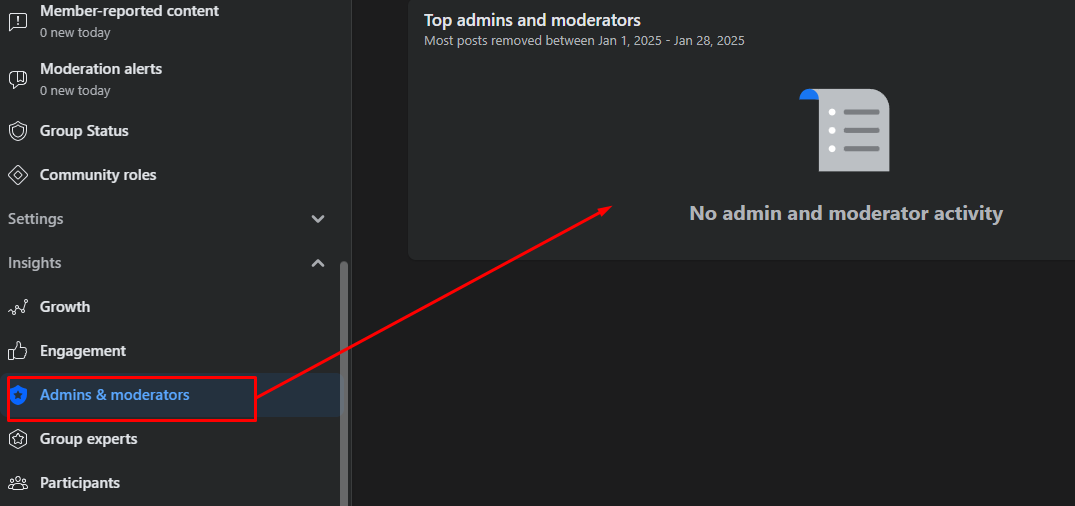
Admins and moderators can see data about member activity. You’ll know how often people post or engage. This helps you manage the group and focus on what works.
Recognize Group Experts
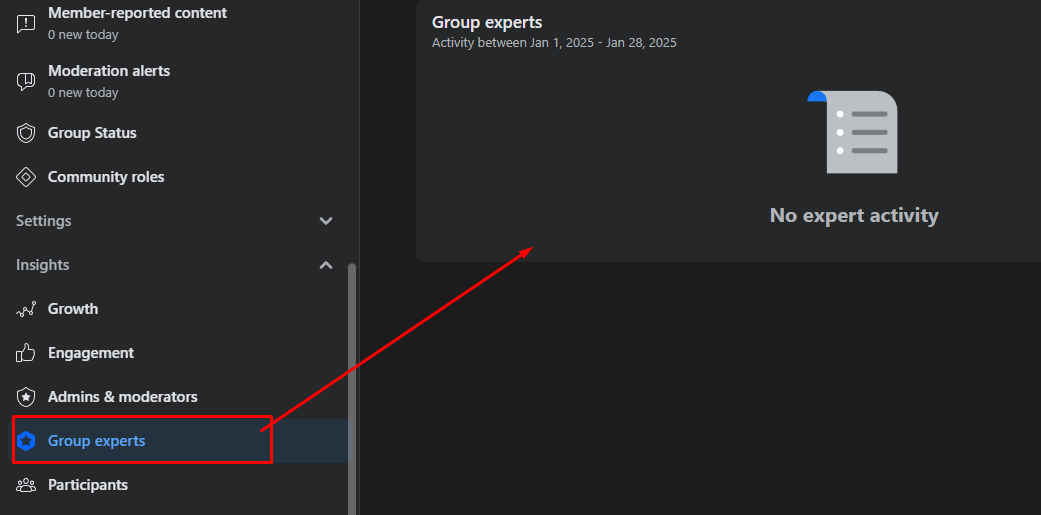
You can find active members who post or comment a lot. Facebook lets you tag them as Group Experts. This encourages more participation.
Understand Participants
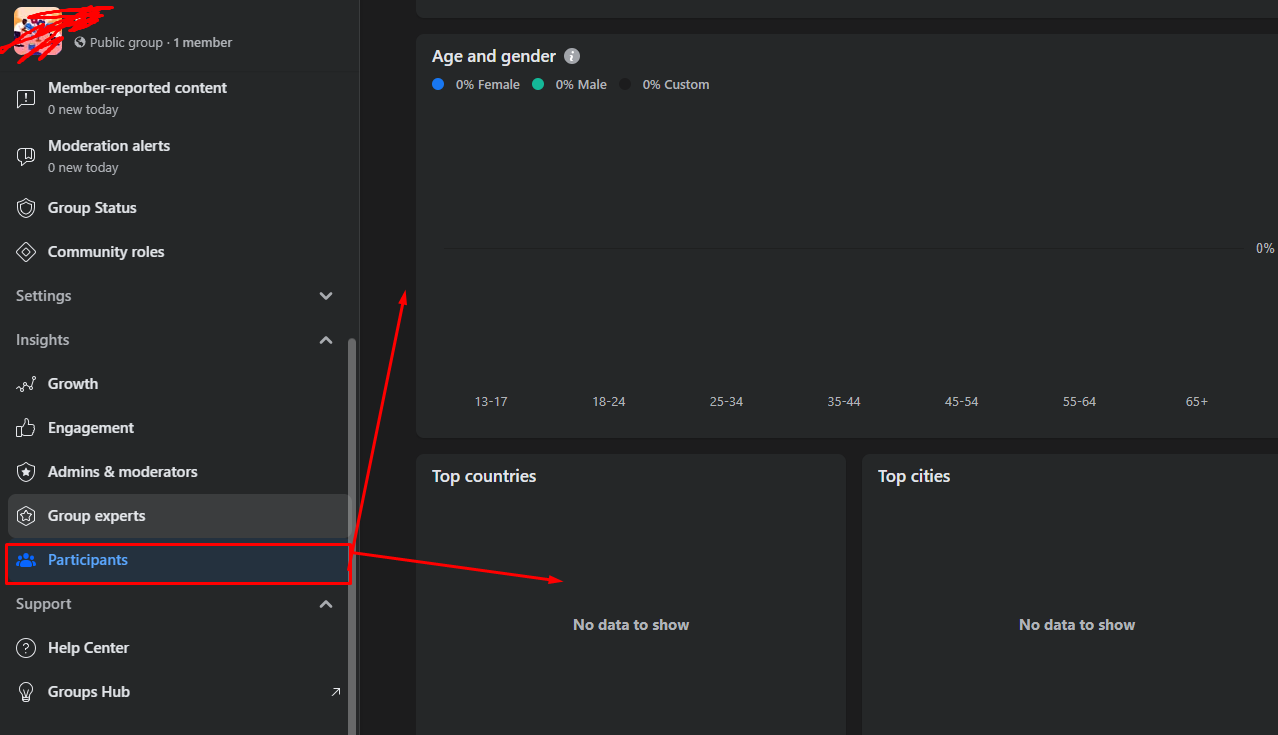
Insights show who your top contributors are by age and gender, as well as top countries and cities. This helps you post at the right time and reward members for getting involved.
Final Tips
Promote your group on your Facebook Page, email, or website.

- Keep the group active with polls, live videos, or Q&A sessions.
- Review your group settings occasionally to make sure everything works smoothly.
Interested in learning about the best automation tools for groups on Facebook? Visit this informative blog now!
Troubleshooting Tips
What to Do If You Can’t Find the ‘Create Group’ Button?
If you can’t find the ‘Create Group’ button, try these steps:
- Clear your browser cache.
- Update the app if you’re using it.
- Check your admin privileges to make sure you have permission.
How to Manage Inactive Members?
If some members are inactive, try these tips:
- Run a member cleanup campaign to remove inactive members.
- Do re-engagement activities, like posting polls or asking questions, to get them involved again.
How to Switch Privacy Settings Later?
You can switch privacy settings later, but there are limits.
- Once your group has members, you can only switch between Public and Private.
- To change, go to the group settings and click on "Privacy."
**Remember, once a group is private, you can’t make it public again.
Want to learn about the best Facebook group management software? Then, you can check out this informative blog now!
Wrapping Up
So, coming to this point, I can assume that you now have a pretty good idea of how to create a Facebook group for an organization. Creating a Facebook Group is a powerful way to grow your organization’s community.
By following these steps, you’ll set up a group that fosters engagement, shares valuable updates, and builds trust.
Ready to start? Go create your Facebook Group today!
Also, contact me if you face any issues!
If you want to use Facebook for Affiliate Marketing, you can check out this informative blog now to get a detailed idea.
faqs
Facebook doesn’t limit how many people can join a group, but once a group has 5,000 members, there are some rules. For example, admins can’t send one message to everyone in the group.
Facebook lets you join up to 250 groups in 24 hours. This helps keep things clean and safe.
Yes, if a group has no activity for two years, Facebook will delete it. Also, Facebook groups can be deleted if they break the rules, like sharing hate or fake content.
Groups may also be deleted if the only admin leaves or deletes their account. If someone hacks an admin's account, the group could be deleted, too.
Yes! You can make money by showing ads, selling things, or charging for special memberships. Just follow Facebook’s rules.
Yes, you can change the name, but it has limits, especially for bigger groups. You may need Facebook’s approval if you change it too often.
Go to the "Members" section, find the person you want to make an admin, click the three dots next to their name, and select "Make Admin."
Yes, you can link your group to your Page. It helps more people find your group.
Make clear rules, keep an eye on posts, and fix issues quickly. Having more moderators helps with bigger groups.
It comes with the Thrive Architect plugin for WordPress. You can get it here.
Set strong rules, use filters, and watch posts closely. For larger groups, you can use extra tools to help manage posts.
You can't directly make money in the group, but you can use the group to send traffic to other places where you can earn money or offer special deals.
Want to learn how to get leads from Facebook groups in 2025 [100% Free]? Then, you can check out this insightful blog now!


