Hey! Have you ever wanted to create a space online where only your close friends, family, or team can connect and share? Maybe you’re planning a surprise party, running a project, or just want a private place to chat without the whole world seeing.
Imagine this: A private Facebook group where only the people you invite can join. No strangers. No random comments. Just your people, your rules, and your privacy. Sounds perfect, right?
Well, guess what? It’s super easy to set up! I’m going to show you step-by-step how to create a private Facebook page for a group.
By the end of this, you’ll have your own private Facebook group ready to go.
Let’s get started.
Key Takeaways:
- Private Groups Keep Things Safe: Only invited members can see posts and join. Perfect for close-knit groups.
- Easy to Set Up: Just log in, click “Create New Group,” and fill in the details.
- Choose Privacy Settings: Pick “Private” to control who sees your group.
- Customize Your Group: Add a name, cover photo, and description to make it unique.
- Invite Members: Add friends or share a link for others to join.
- Manage Your Group: Set rules, approve members, and keep the space friendly and organized.
So, How Can You Create a Private Facebook Page for Your Group?
Follow the steps below, from first to last, to perfectly create your private FB page.
Step 1: Log in to Your Facebook Account
- Open Facebook on your phone, tablet, or computer.
- If you’re not logged in, enter your email/phone number and password.
- Make sure you’re using the account from which you want to manage the group.
Step 2: Go to the “Groups” Section
On the left side of your screen (on desktop) or at the bottom (on mobile), click “Groups.”
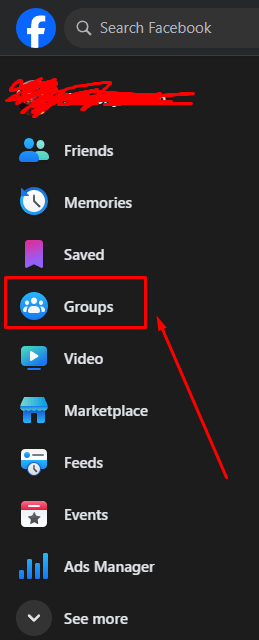
- If you don’t see it, click “See More” to find it.
Step 3: Click “Create New Group”
- Look for the “Create New Group” button.
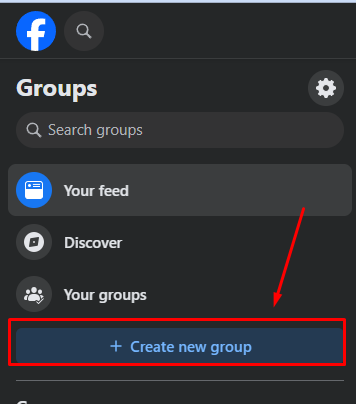
- It’s usually at the top of the Groups page.
- Click it to start setting up your group.
Step 4: Fill in the Group Details
- Group Name: Choose a name for your group. Make it clear and relevant.
- Example: "Healthy Living Tips" or "Small Business Owners Network."
- Add Members: Add friends or people you want in the group. You can skip this and add them later.
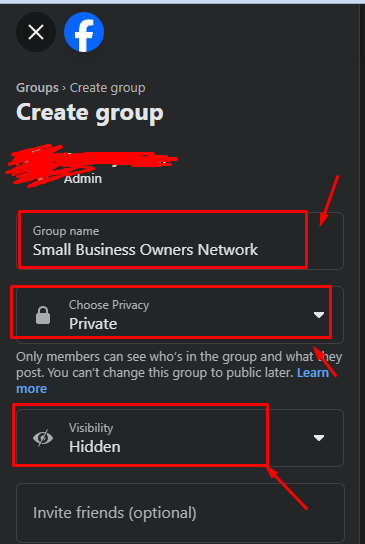
- Privacy Settings: Here’s the important part!
- Select “Private”.
- This means only members can see posts and who’s in the group.
- Choose “Visible” if you want people to find the group, or “Hidden” if you want it completely secret.
Step 5: Customize Your Group
- Click “Create” after filling in the details.
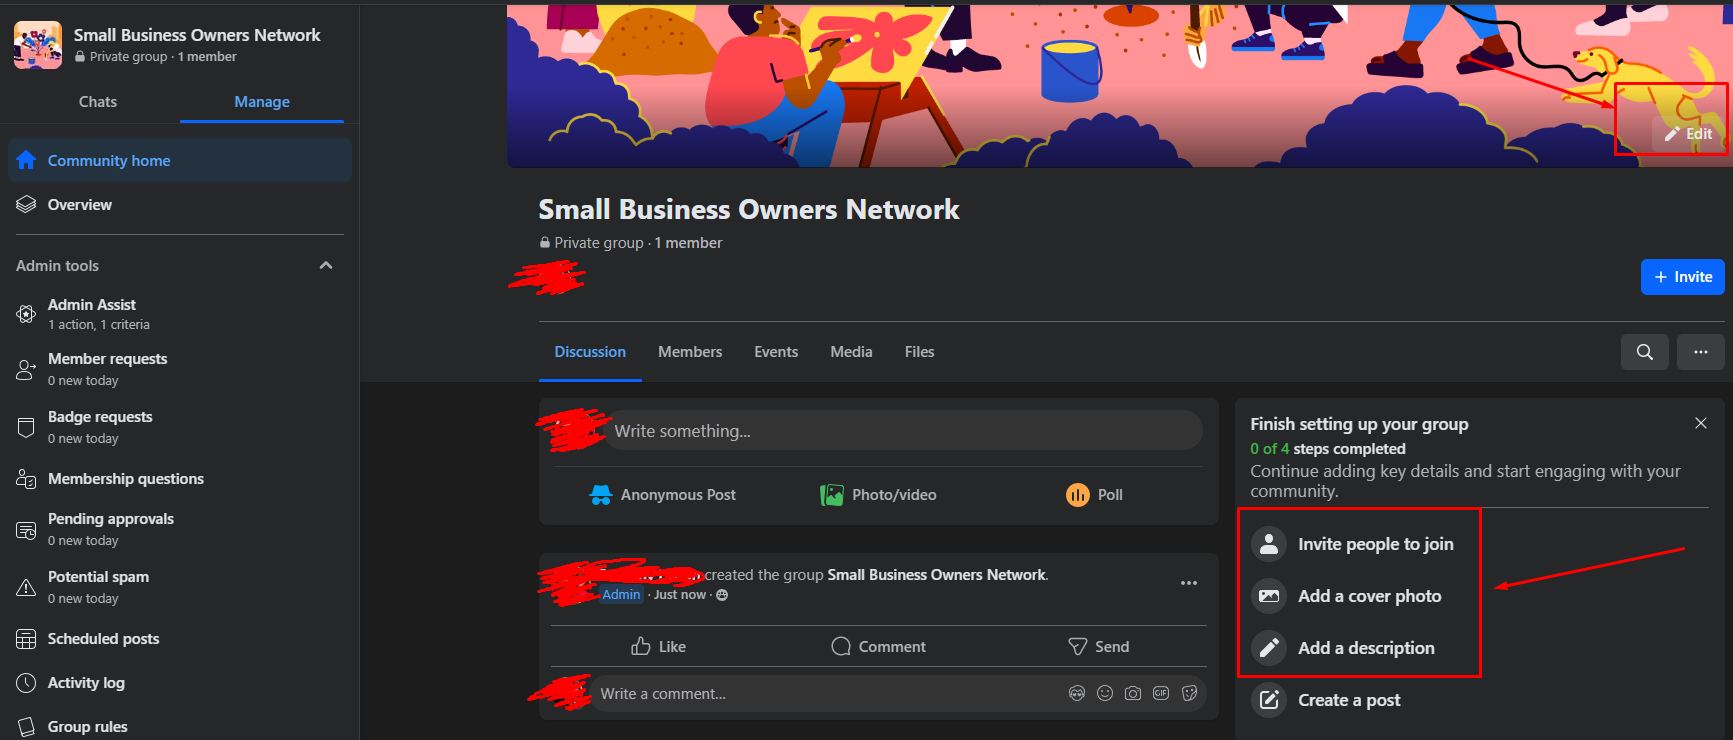
- Now, you’ll see options to customize your group:
- Add a cover photo that represents your group.
- Write a description explaining what the group is about.
- Add tags to make it easier to find (if it’s visible).
Step 6: Set Group Rules and Guidelines
- Go to the “Rules” section.
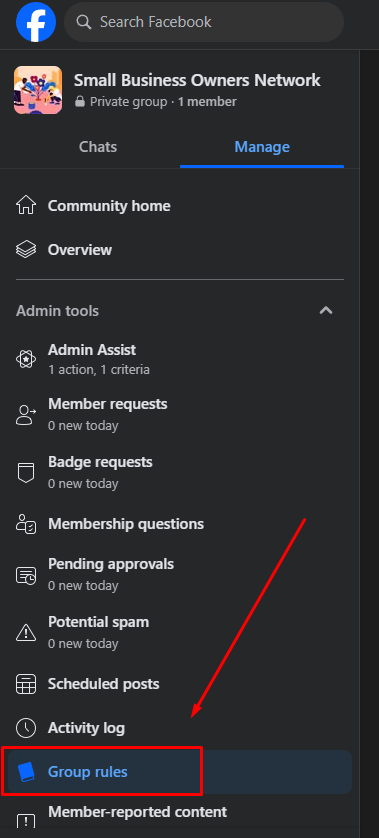
- Write clear rules for your group.
- Use rules to help set the tone for your group and help prevent member conflict.
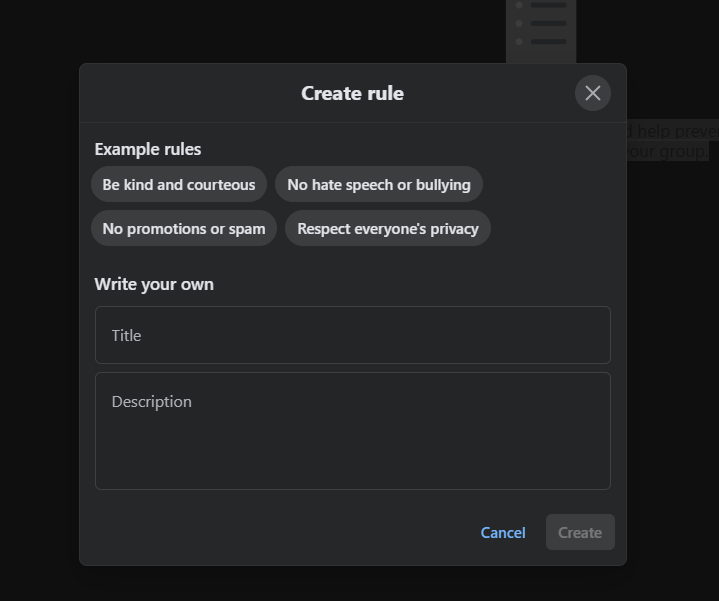
- You can write up to 10 rules about your group.
- This helps keep things organized and respectful.
Want to get some effective Facebook group management tips? Then, here is the blog for you.
Step 7: Invite Members
- Click “Invite” to add people to your group.
- You can invite friends or share a link for others to join.
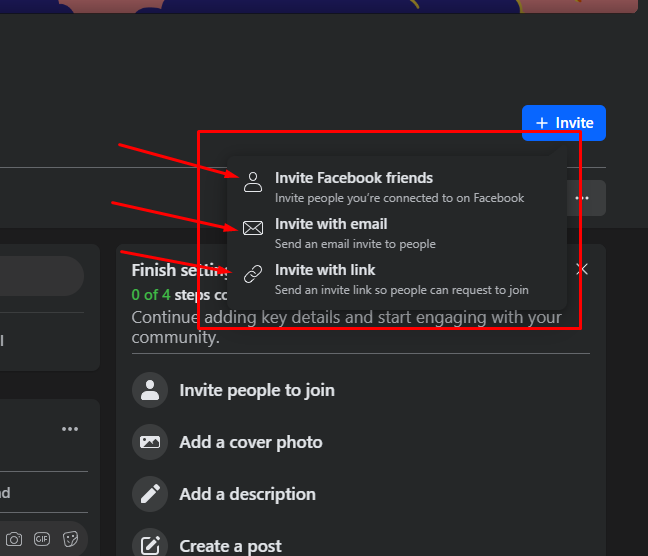
- If the group is hidden, only people with the link can join.
Step 8: Adjust Group Settings
- Click the “Settings” button (it looks like a gear icon).
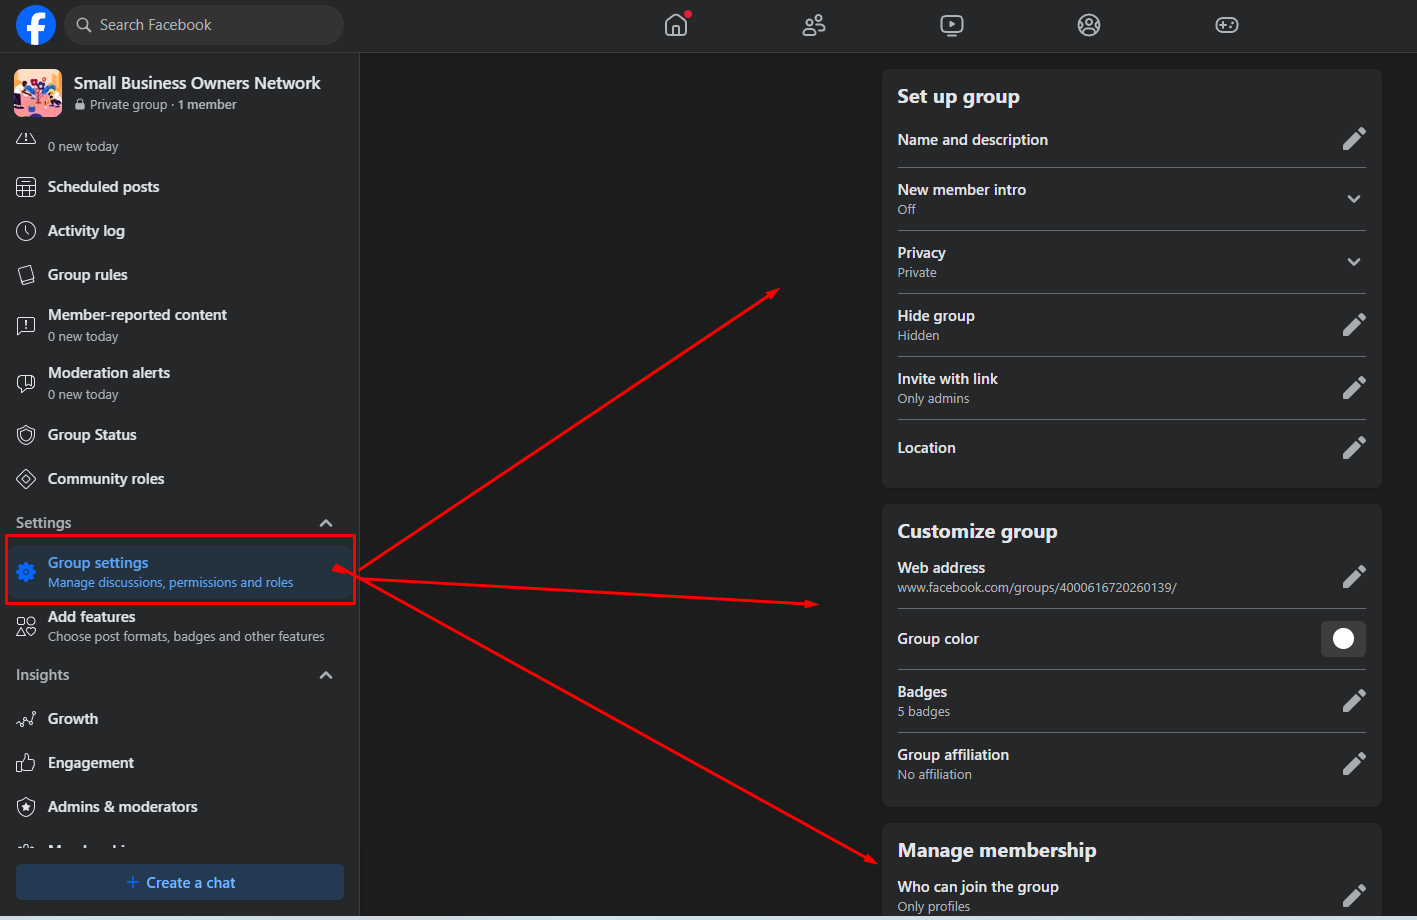
- Here, you can:
- Control who can post or comment.
- Approve or block members.
- Turn on or off features like polls or events.
Also,
Step 9: Start Posting!
- Your group is ready!
- Share a welcome post to greet members.
- Encourage others to post and engage.
Step 10: Manage Your Group
- Keep an eye on your group.
- Approve new members.
- Reply to comments and start discussions.
- If the group grows, get help from trusted members.
- Remove spam or rule-breakers.
- Make sure everyone feels welcome and safe.
Extra Features to Know About
Alright, you’ve created your private group.
But wait, there’s more cool stuff you can use!
Group Insights (For Admins)
- Want to know how active your group is?
- Click on "Group Insights."
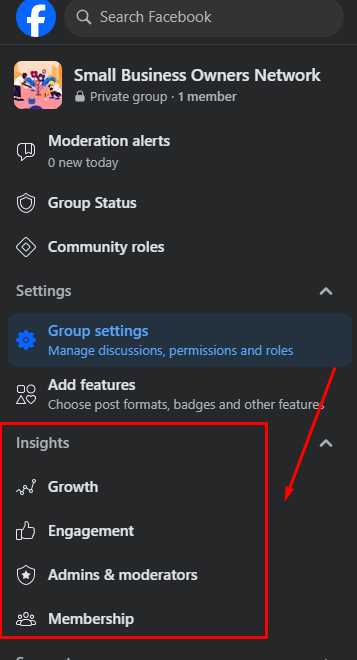
- You’ll see who’s posting, commenting, and engaging the most.
Scheduled Posts
- Busy?
- No problem!
- You can schedule posts to go live later.
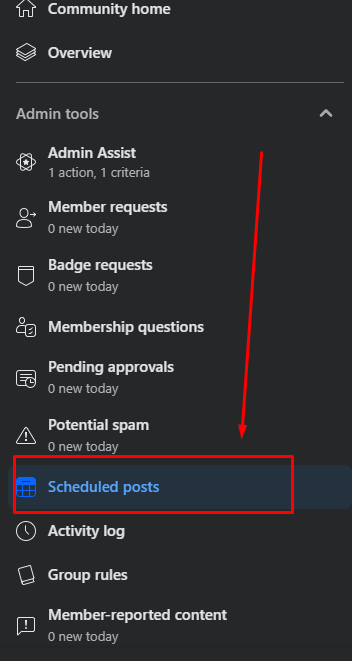
Just write your post, click the little calendar icon, and choose a date/time.
Membership Questions
- Want to control who joins?
- Set up questions for new members.
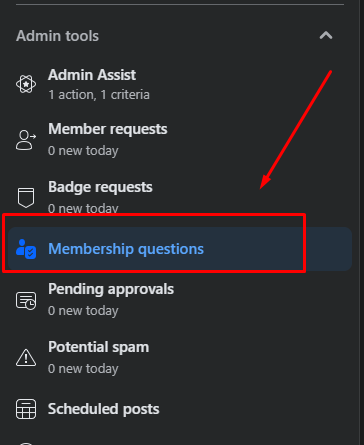
- This helps you pick the right people.
- Example: “Why do you want to join this group?”
Guides (Learning Units)
- If your group is about learning something, create "Guides."
- It’s like a mini-course inside your group.
- You can organize posts into lessons.
Badges
- Facebook gives badges to active members.
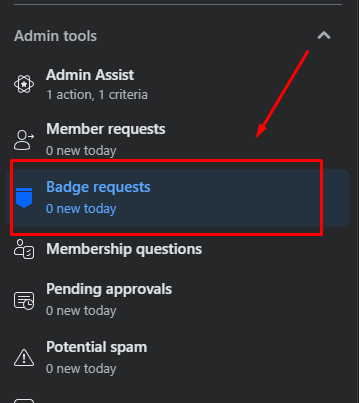
- It’s fun and shows who’s contributing a lot.
- Admins get a special badge, too!
Group Roles
- Assign roles like Admin or Moderator.
- Admins have full control. Moderators can help manage posts and members.
Pinned Posts
- Pin important posts to the top of the group.
- Great for rules, announcements, or FAQs.
Polls and Events
- Use polls to get opinions from members.
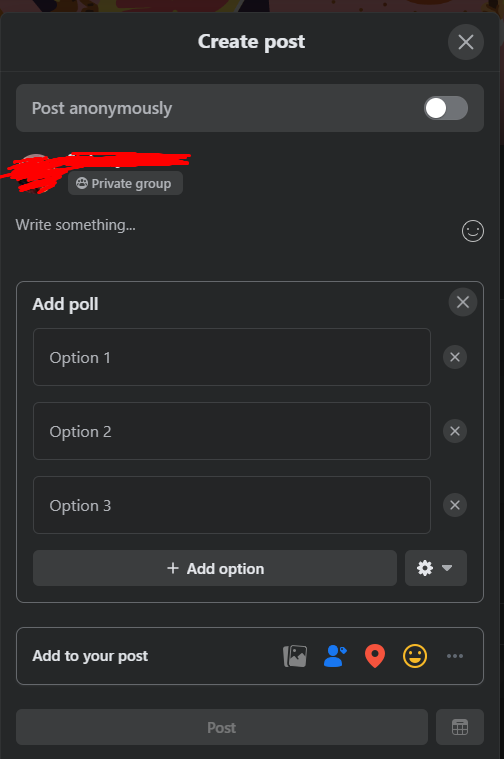
- Create events for meetups or special dates.
File Sharing
- Share files like documents or photos.
- Helpful for workgroups or projects.
Watch Party
- Watch videos together with your group.
- Fun for movie nights or sharing tutorials.
Linked Chat
- Create a group chat linked to your Facebook group
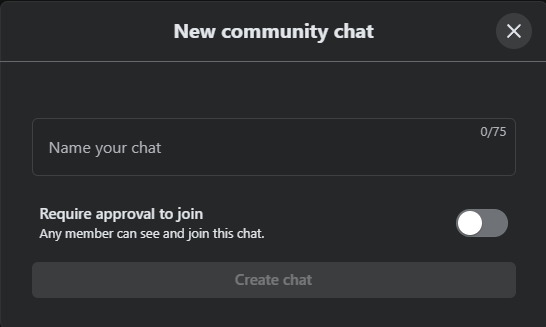
- Makes quick conversations easier.
Want to learn about the best automation tools for groups on Facebook? Check out this informative blog now!
What to Avoid
Now, here’s what NOT to do:
01. Don’t Approve Everyone
- Just because someone requests to join doesn’t mean they should.
- Check profiles first to avoid spammers.
02. Avoid Over-Posting
- Too many posts can feel like spam.
- Quality over quantity.
03. No Ignoring Rules
- Create clear group rules and stick to them.
- This keeps your group friendly and safe.
04. Don’t Forget to Moderate
- Even in private groups, things can get messy.
- Keep an eye on posts and comments.
05. Avoid Being Inactive
- If you don’t post, your group will feel empty.
- Stay active to keep people engaged.
06. Don’t Make It Public by Mistake:
- Double-check your privacy settings.
- Always choose “Private” if you want it to stay exclusive.
07. Don’t Ignore Member Requests:
- Regularly check and approve new members.
- Keeps the group active and growing.
In addition, are you interested in learning about the best Facebook group management software? Then, you can visit this insightful blog now!
Wrapping Up
So, hopefully, you now have a pretty good idea of how to create a private Facebook page for a group. It’s simple, right? Now, you can connect with your group members privately and share whatever you like.
If you have any questions, just ask! I’m here to help. 😊
Besides, do you want to learn how to get leads from Facebook groups in 2026 [100% Free]? Then, you can visit this insightful blog now!
faqs
To create a private Facebook group, login, click “Groups,” then “Create New Group.” Name your group, set privacy to “Private,” and add members.
Then, customize it with a cover photo and description. Use settings to manage roles, rules, and permissions for a secure, exclusive space.
Yes! Go to group settings, click “Privacy,” and switch to private. Only members will see posts afterward.
Learn how to create a Facebook group for an organization from this insightful guide.
Go to the members list, click the three dots next to their name, and select “Remove from Group.”
Yes! Enable “Post Approval” in settings. All posts will need admin or moderator approval first.
Go to the members list, click the member’s name, and select “Make Admin.” They’ll help manage the group.
Yes! Use Facebook’s “Schedule Post” feature when creating a post. Choose the date and time to publish.
Click the notification bell in the group. Choose “All Posts,” “Highlights,” or “Off” to control alerts.
Yes! Go to settings, click “Member Permissions,” and adjust who can comment on posts.
Go to group settings, click “General,” and select “Delete Group.” Confirm to remove it forever.
No, deleted groups can’t be recovered. Make sure you really want to delete it before confirming.


